

Imagine your website as an elegant tailored suit. The right photo size is the cut - it determines whether the suit will look flawless, or whether it will be too big and clumsy, or too small and ridiculously stretched. Image size is much more than a technical detail; it's key to your online success because it directly affects site speed and how consumers perceive your brand.
Why photo size is crucial
Whether it's a web page, a social media post or a printed brochure, the size of your images has a direct and measurable impact on your business. It's not just a small thing for designers, but a foundational element of your digital strategy.
If you underestimate this aspect, you risk getting into serious trouble. Often they remain hidden until they start to ruin your results.
Impact on site speed and SEO
Loading speed is one of the most important factors that Google considers when ranking. And who is the biggest enemy of a fast website? Huge, unoptimized images. When a visitor opens a page with heavy images, their browser has to download a huge amount of data, and that takes valuable time.
Every second delay in loading can bring down conversions by 7%. For an online shop with a daily turnover of 100 000 BGN, this means an annual loss of over 2.5 million BGN.
A properly sized photo, coupled with effective compression, dramatically reduces load times. This not only pleases users, but also sends clear positive signals to search engines, resulting in better rankings. Of course, speed also depends on the quality of your hosting and domain, because a good foundation allows optimized content to reach its full potential.
User experience and brand perception
Put yourself in the customer's shoes. You're looking at a product gallery, but each photo is painfully slow to load or looks blurry and pixelated. What's your first impression? Most likely - of unprofessionalism and lack of attention. This feeling undermines your brand credibility in an instant.
Well-optimized images, on the other hand, provide a smooth and enjoyable experience. Here's how the right size affects perception:
- Professionalism: Crisp, clean and fast-loading photos show that you've studied every detail.
- Trust: Quality visuals help people believe in the products and services you offer.
- Engagement: Users are much more likely to stay on your site and view content if it is visually appealing and easily accessible.
When you master the basics, you save yourself not only time, but also money by avoiding costly mistakes in both web design and preparing marketing materials for print.
Let's unravel the basic terms without complicated jargon

To choose the right photo size, you do not need to be a graphic designer. But it is good to know the language in which the images "speak". Let's break down these supposedly complicated terms into very simple, understandable chunks. That way you can have a confident conversation with any professional and make the best decisions.
Imagine each digital photo as a huge mosaic. It's made of thousands, even millions, of tiny coloured squares stacked tightly together. Each such square is pixel (pixel) - the smallest building unit of the image.
When we say that a photo is 1920×1080 pixels, this means that our mosaic has 1920 squares in width and 1080 in height. The more pixels, the more detailed and clear the picture can be. Just as a mosaic with more elements can show a much more complex and rich scene.
Dimensions in pixels vs dimensions in centimetres
Confusion often arises here, so let's clear it up once and for all. The dimensions in pixels are the most important for the digital world - the screens of computers, phones and tablets. They determine how much space the photo will take up on the screen.
On the other hand, the dimensions in centimetres or inches are physical measures. They only matter when we are going to print something. The same 3000×2000 pixel photo can be printed as a small 15×10 cm card and as a large poster. However, the quality will be radically different, and that leads us right into the next important term.
Resolution is the bridge that connects the digital world of pixels to the physical world of print. It determines how „densely“ the pixels will line up when we transfer them to the paper.
What is resolution and why DPI is so important
Resolution is measured in DPI (Dots Per Inch) or „dots per inch“. This value tells us how many pixels of the photo will print on one inch (2.54 cm) of paper. Think of it as the density of detail.
- Lower DPI (e.g. 72): The pixels are further apart. This is ideal for the web because screens have their own, fixed resolution. A value of 72 DPI is the standard for the Internet - the picture is clear and the file is not too large to not slow down the loading of the site.
- Higher DPI (e.g. 300): Here the pixels are „packed“ much more densely. This is a mandatory standard for quality printing. If you try to print a photo at 72 DPI, it will look grainy and blurry because the pixels will be large and visible to the naked eye.
Understanding this difference is key. When preparing a photo for a website, the focus is on pixel dimensions (e.g. 1200 px wide) and small file size. However, when sending it to a print shop, the most important thing is to ensure 300 DPI, to look flawless.
Examples from real life
Let's see how all this works in practice. Let's say we have a digital photo with dimensions 3000 pixels width and 2400 pixels height.
- For a weblog article: We can safely reduce it to 1200×960 pixels at 72 DPI. This way it will look perfect on the screen and load fast.
- To print a brochure (A4): In order to print it in quality, the resolution must be 300 DPI. Divide 3000 pixels by 300 DPI and you get 10 inches. This means that the maximum width for a quality print of this photo is about 25.4 cm.
Now when a designer or printer asks you for a „high resolution“ or „300 DPI“ file, you'll know exactly what they mean. You no longer speak different languages, but have a common ground that ensures the end result - on screen or on paper - will be exactly what you want it to be.
How to choose the perfect photo size for a website
After we've covered the basic concepts, it's time to get down to the practical part. Selecting the right photo size for a website isn't just a hunch - it's a strategy. Every element, from the big banner on the homepage to the smallest icon, plays a role in the speed and visual harmony of the site.
Your task is to find the happy medium: impress visitors with crystal clear images, but also deliver lightning fast loading times. If you don't, you risk crashing your SEO rankings and driving away every eager user.
Recommended dimensions for key elements of the site
Every site is different, of course, but most share the same visual components. Here are a few specific recommendations that will serve as a great starting point.
- Large banner (Hero Image): It's the first thing people see, and it should grab attention right away without slowing down the site. Go for a size around 1920×1080 pixels - this is the standard 16:9 aspect ratio, ideal for most full-HD screens.
- Photos in blog articles: Here you have a little more freedom. For photos that stretch the full width of the text, it's better to aim for a width between 1200 and 1500 pixels. The height can now vary according to the frame.
- Product photos (for online stores): Details are everything here. Square formats from 1000×1000 pixels, and why not 1500×1500 pixels, are standard. They enable customers to zoom in on the photo and view the product up close without losing quality.
By the way, maintaining a uniform aspect ratio - for example 1:1 for all products - creates a sense of order and professionalism. This is especially important in product catalogues, where chaotic sizes can ruin the whole design.
Speed optimization - your SEO's best friend
Even if you've chosen the ideal pixel dimensions, if the file is too heavy, all your work goes to waste. Huge files are a major culprit for slow loading, and that's something Google frankly punishes.
Every 100KB you save on total page size can improve conversions. Image optimization is the easiest way to achieve this, as you can often bring the file size down by over 70% with no apparent loss of quality.
Fortunately, you don't have to be an expert. There are great and free online tools that do the dirty work for you:
- TinyPNG / TinyJPG: Super easy to use. Simply drag your JPEG or PNG files and the tool intelligently compresses them, removing all unnecessary data.
- Squoosh: Developed by Google, Squoosh is more powerful and gives you full control. You can see in real time how changes affect quality and size, and convert between formats.
Those few minutes you spend on compression can have a huge positive effect on your site.
JPEG, PNG or WebP - which format is used for what
Choosing the right file format is as important as the size itself. Each has its strengths and weaknesses, and which one to choose depends entirely on the type of image.
-
JPEG (or .jpg): This is your universal fighter. It's ideal for standard photographs with lots of colour and nuance - product shots, landscapes, portraits. JPEG uses lossy compression, which allows it to achieve a very small size, but does not support transparency.
-
PNG (.png): Use PNG whenever you need it transparent background. This is the format for logos, icons and graphics that need to blend in with the site design. It compresses losslessly, which preserves every detail, but the files often get larger than JPEGs.
-
WebP (.webp): It's Google's modern format that takes the best of both worlds. WebP provides significantly smaller files than JPEG and PNG at the same quality and even supports transparency. It works on all modern browsers today and is highly recommended for optimal speed.
The right combination of size, compression and format is the foundation of any good looking and fast website. Mastering these elements is a key step if you're aiming for a successful website development, that doesn't just look good, but works flawlessly for your business.
Entering the world of printed materials
Transitioning from the digital to the print world is a bit like swapping your car for a boat - the rules are completely different. While with websites we struggle to save every kilobyte, with print compromising on quality is absolutely taboo. Here the right photo size and high resolution are not just a recommendation, but a law.
Every brochure, business card or flyer that reaches the hands of customers is a physical reflection of your brand. If the image is blurry or in tiny squares, it immediately creates a feeling of unprofessionalism. Take some time to understand the basics and you'll save yourself money, headaches and most of all - ensure your marketing materials look flawless.
The gold standard of 300 DPI
It has already been said that the resolution we measure in DPI (dots per inch), indicates how closely the pixels are spaced on the paper. In the world of printing, there is a magic number that every professional observes almost religiously: 300 DPI.
Remember this: 300 DPI is the bare minimum for any image that goes to the printer. This density ensures that the human eye will not distinguish individual dots, but will perceive the picture as smooth, crystal clear and rich in detail.
Use a lower resolution photo, such as the standard web 72 DPI, is a sure recipe for disaster. The result will be a pixelated image with rough edges and pale colors - something that completely defeats the whole endeavor.
The most common print sizes in Bulgaria
When preparing files for print, think in physical units - centimetres or millimetres. There are several established standards in Bulgaria that are widely used for both personal and business purposes.
- 10×15 cm (photos): This is the classic of the photo printing genre. Ideal for photo albums, frames or small promotional cards.
- A4 (21×29.7 cm): The standard size for flyers, brochures, letterheads and all kinds of documents.
- A3 (29.7×42 cm): Often used for smaller posters, restaurant menus and presentations that need to catch the eye.
- Business card (9×5 cm): The standard size for business cards. It is important to observe so that the business card fits comfortably in any wallet.
Preparing the digital file is simple if you use this formula: (size in cm / 2,54) * 300 = required pixels. For example, for the photo 10×15 cm you will need a file size of about (15 / 2,54) * 300 = 1772 pixels on the long side.
How standard size saves you money
Sticking to standards is not just a whim of printers, it is economically sensible. In Bulgaria the standard size 10x15 cm is preferred by over 70% by customers because it matches the 3:2 aspect ratio of most cameras and allows printing without annoyingly cropping part of the frame.
Errors in size and resolution often lead to 15-20% loss of material and the need for reprinting, which for a small company can mean unforeseen costs between 200 and 500 lv. per order. To plan more efficiently, you can learn more about standard and non-standard sizes in printing from essteticprint.com.
In the end, when you send a file to the printer prepared according to all the rules, you save yourself costly mistakes and delays. It's an investment in quality that pays off immediately and works directly for your business's reputation.
What photo sizes should we use on social media?
In the world of social media, first impressions are almost everything. Here, the right photo size is not just a technicality, but a fundamental element of your professional presence. Every platform has its own rules, and if you ignore them, you run the risk of having the most important part of your message - whether it's a logo, product or call to action - unceremoniously cut off.
Think about it, every network automatically compresses and sizes what you upload to fit its interface. When you upload a photo with the wrong dimensions, you're basically letting the algorithm decide how your content will look. And that often means only one thing: loss of quality, ugly cropping, and ultimately, an unprofessional look that slowly but surely destroys your brand's credibility.
Facebook sizes for a perfect look
While not the newest platform, Facebook continues to be a key place for many businesses in Bulgaria. In order to make your posts look really good, it's important to stick to current sizes that work optimally on both desktop and mobile.
- Profile photo: Minimum 180×180 pixels. It is displayed in a circle, so the key elements (like the logo) must be right in the centre to avoid being cut off.
- Cover Photo: Recommended 851×315 pixels for desktop. It's important to know that on mobile devices it cuts out the sides, so don't put text or important information in the margins.
- Photo for post: The ideal size is 1200×630 pixels. This ratio (1.91:1) shows up well in the news stream and attracts attention.
The practice of Bulgarian digital agencies shows something interesting: businesses that use optimized images report an average of 40% higher engagement. The right size simply makes your message clearer and more impactful, which directly affects results.
Instagram posts and stories
Instagram is entirely visual territory. Here, quality and the right format are absolutely everything. Square is still a classic, but vertical formats have long dominated, especially with Stories and Reels.
Here are the best options for standard posts in the feed:
- Square: 1080×1080 pixels (1:1 ratio) - the timeless classic.
- Portrait (vertical): 1080×1350 pixels (4:5 ratio) - this is the gold standard because it takes up more space on the phone screen and is harder to miss when scrolling.
- Landscape (horizontal): 1080×566 pixels (aspect ratio 1.91:1) - suitable for panoramic shots.
Vertical format is the king
For Stories, Reels, and TikTok, the standard is the same: 1080×1920 pixels. This is a ratio 9:16, which fills the entire mobile screen and immerses the user in the content. In Bulgaria over 85% of viewing such content is on vertical formats, because that's how we hold our phones. When the size isn't right, in about 35% of cases, it ends up auto-cropping, which can completely ruin your visual communication.
If you want to learn how to use these formats as effectively as possible, check out our pro tips for social media marketing.
And while the world of social media is dynamic, the rules of print are much more definitive and require a consistently high resolution, as the image below shows.
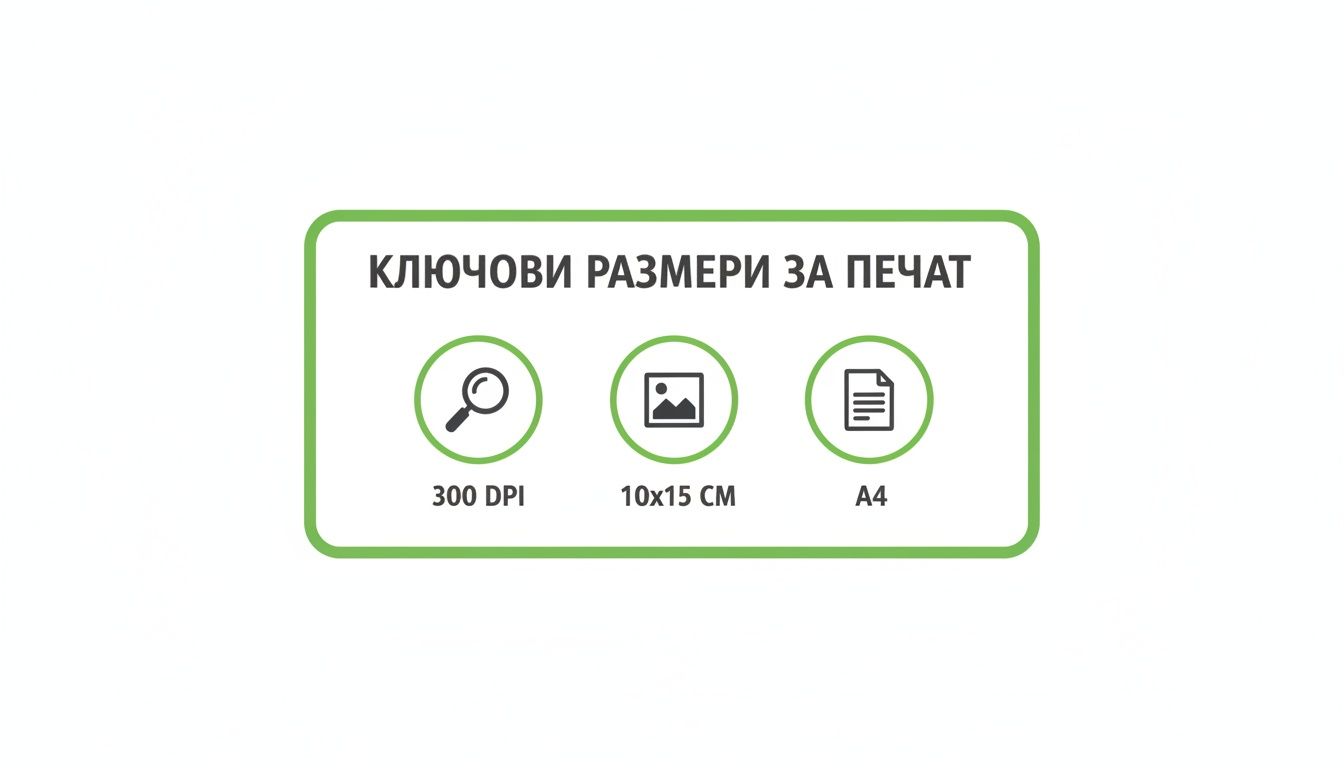
As you can see, the standard of 300 DPI is an absolute must if you want your printed materials to look crisp and professional, not blurry.
To make it easier for you, we've compiled the most important dimensions for popular nets into one table.
Recommended sizes for popular social networks
This quick guide will help you ensure your content looks perfect on any platform.
| Social network | Publication type | Recommended size (pixels) |
|---|---|---|
| Profile photo | 180×180 | |
| Cover photo | 851×315 | |
| Photo for post | 1200×630 | |
| Profile photo | 320×320 | |
| Post (square) | 1080×1080 | |
| Post (portrait) | 1080×1350 | |
| Story / Reel | 1080×1920 | |
| Personal profile picture | 400×400 | |
| Cover of company page | 1128×191 | |
| Photo for post | 1200×627 |
Keep this table somewhere handy - it will save you a lot of time and headaches.
Sizes for LinkedIn Professional Network
LinkedIn is a place to build a professional image, and every detail is important here. A blurry profile picture or poorly cropped cover can seriously damage your reputation.
- Personal profile picture: Recommended 400×400 pixels.
- Personal cover (Background): 1584×396 pixels.
- Logo on company page: 300×300 pixels.
- Cover of company page: 1128×191 pixels.
Adhering to these dimensions ensures that you and your company exude competence and reliability. Remember that every photo size is a small but important piece of your digital identity puzzle.
What you need to know about photos for official documents
When it comes to ID, passport or visa photos, the rules become ironclad. There's no room for improvisation here - every millimetre and every pixel counts, and even the slightest deviation will almost certainly result in your documents being rejected. These are not just recommendations, but strict requirements to ensure that biometric systems can identify you unmistakably.
The truth is that non-compliance with these rules is one of the most common reasons for returning applications. And that means only one thing - delays, unnecessary stress and extra costs. The problem is serious not only for individuals, but also for companies whose employees travel constantly and simply do not have time to waste in administrative hurdles.
The dimensions - digital and physical
For documents, the requirements always concern both the digital and physical dimensions of the photo. The two are not interchangeable and must be met with absolute precision.
- Digital Size: For many online applications, such as the one for the U.S. Diversity Visa (better known as the Green Card), the photo must be a perfect square - 600×600 pixels.
- Physical size: When submitting on paper, the standard size is usually 51×51 mm (or 2×2 inches).
- File size: Digital files are necessarily optimized. Often there is an upper limit, for example to 240 kB, to avoid overloading the application systems.
Let's take the US DV-visa again as an example: the digital photo must be exactly 600x600 pixels, in JPEG format and with file size up to 240 kB. Statistics show that around 25% of visa applications are returned precisely because of problems with the photos. In addition, the head should occupy between 50% and 69% of the total frame height. You can read the full instructions for DV-visa on the official website of travel.state.gov.
Composition and other key requirements
Size is important, but it is far from everything. There are other rules that are just as uncompromising.
The background should be completely neutral - usually pure white or very light grey, with absolutely no shadows, objects or patterns. The face should be looking straight ahead, with a neutral expression and eyes fully open.
Here are a few more details to watch out for:
- Relevance: The photo must have been taken within the last six months to match your current appearance.
- Glasses: Wearing glasses is now prohibited in most cases unless it is medically impossible to remove them. Even then, a doctor's note may be required.
- Clothes: Avoid uniforms. Your clothes should not blend in with the background colour (e.g. white shirt on a white background).
Taking care of these details is the first and most important step towards a successful submission. Save yourself the hassle and check everything in advance.
Frequently asked questions about photo size
When you dive into the world of imaging, it's only natural that a bunch of questions come up. Sometimes you just need a quick and clear answer, without having to flip through long manuals. That's why we've put together the solutions to the most common conundrums related to the right photo size.
In the following lines, you will find practical guidelines and easy-to-use tools that you can apply immediately. Our goal is to save you time and help you achieve professional results, no matter what the task.
How to resize a photo without spoiling it?
This is probably the biggest pain point for anyone working with imaging. The key thing to remember is this: Increasing on a small photo almost always results in a loss of quality. There's just no way to make magic happen - the software has to "invent" pixels that are missing, and the result is that unpleasant blur.
The trick is in the right reduce on the size. Always, always start with the largest and highest quality original you have. Instead of using regular Paint, use specialist tools like Adobe Photoshop or free online alternatives such as Photopea. They have much smarter algorithms (e.g. Bicubic Sharper), which protect the workpieces when shrinking.
What is the difference between DPI and PPI?
Many people confuse them and use them as synonyms, but they actually describe completely different things. Let's explain it simply.
- DPI (Dots Per Inch): This concept lives only in the world of print. It stands for "dots per inch" and indicates how many physical ink dots the printer will overlay on an inch of paper.
- PPI (Pixels Per Inch): This in turn refers for screens only - on your computer, phone, tablet. It means "pixels per inch" and describes how densely the pixels are arranged on the display.
To remember it easily: PPI is for screen, on which you look at the picture. DPI is for the paper, on which you print it. When your printer asks for a file with a certain DPI, this is the setting you should pay attention to.
Which format is better for logo - PNG or SVG?
The short answer is: it depends where you're going to use it.
PNG is a raster image composed of a grid of pixels. It is ideal for websites and social networks, especially when you need a logo with a transparent background. The downside is that if you start enlarging it, it will "pixelate" and lose its sharpness.
SVG (Scalable Vector Graphic) is a whole other beer - it's vector graphics. Instead of pixels, it's made of mathematical curves and formulas. That means you can stretch it to infinity - from a business card to a huge billboard - with absolutely no loss of quality. That's why SVG is the professional standard for logos.
Why do my photos appear blurry on Facebook/Instagram?
Almost certainly the reason is that you haven't uploaded the photo in the size the platform expects. When you upload an image that's too big or has the wrong proportions, the social network squashes and crops it automatically. This process is quite aggressive and almost always results in a visible loss of quality.
The solution? Always check the current recommended sizes for Facebook, Instagram or any other network before posting.
If you want your visuals to look perfect everywhere without having to think about the technical details, the team at BETREND is opposite. We can take care of everything from design to final optimization. Take a look at what we offer https://betrend.bg.
Article created using Outrank